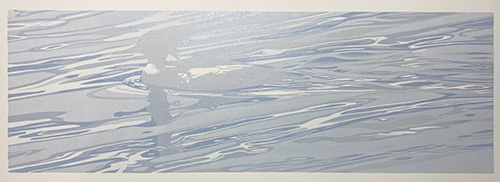
And what's the M-word? Masking, of course. When I typed a title for this post I realized that I have a bit of a knee-jerk reaction to the word "mask," here in what we could call the sort of post-pandemic period.
But the type of mask I refer to is made of newsprint, not filter paper, and it doesn't have strings attached. Not literal ones, anyway.
Reduction printing involves applying all the colors of an image from (often) a single block, layer by layer. But sometimes one doesn't need a particular color to print over the entire image, so little feats of acrobatic fussiness can be employed in the form of masking.
For example... here we are at Step 4 of the current linocut in progress. I'm adding another blue to the water, but it's not a color that's necessary in the body of the bird. I rolled ink over the entire block, but I also covered up some areas with bird-shaped pieces cut from newsprint. These newsprint "masks" prevent the ink from transferring to the print in those areas.
 |
| Reduction linocut in progress: Step 4 rollup and newsprint mask in waiting. |
Hm. Sometimes I explain that better. (This is not an example of exemplary explanation. Say THAT three times fast.) I also didn't take a photo of the block on the press with the mask in place. (Honestly, Sherrie. Get with the program here!) But here's the print at this stage:
 |
| Step 4 printed |
See? No darker blue ink in the bird shape. It's still gray, as it was in the previous step. Clear as mud? Good, because there's more of this sort of thing to come.
Step 5!
 |
| Step 5 rollup and masks |
Here is another blue (another!) which I don't want in the bird OR in its reflection. So I cut two mask shapes from newsprint and set them in the appropriate spot(s) on the inked block.
 |
| Step 5 printed |
Et voila! Except, oh dear. Lousy photo. This was a late night print session, so overhead artificial light reflected strongly on the wet ink. However, I think you can see that the bird and a portion of the reflection did not print this darker blue.
Now it was time to think about some wee bits of color that need to go into the body of the bird, NOT into the water. For this step I'll do some spot inking combined with masking.
 |
| Step 6 spot inking and mask |
The breast of the bird needs to be a sort of brick color and the bill is an orangey red. (It looks super orange in this photo!) I used small brayers to roll this ink only in those two areas, and this time I placed a mask around those shapes instead of on top of them. This created a little window for the color to peek through and transfer to the prints in only those areas.
Here is the block on the press, with the mask in place, ready for the print to be placed face-down on top of it.
 |
| Step 6 ready to print |
 |
| Step 6 printed |
The bird's head also needed to be green, so there was another round of spot inking and masking to apply that color. No photos of the green mask, but here's the result.
 |
| Step 7 printed |
Things are moving right along now, and it seems quite clear what our subject is! All this bright color will be toned down in the next steps, but so far so good!


No comments:
Post a Comment