Tuesday, October 29, 2019

Linocut in Progress: Tree-mendous

After all the fussing about with the clouds and sky it felt good to turn my attention back to the trees and foreground on the current linocut in progress.

A green-to-ochre blend did the trick, bringing the start of some depth to the foreground. 

Green-to-ochre blend, Step 7

I was so pleased to be making progress that I tried to jump in immediately with another color pass, but it's been raining and cool this week and drying time has slowed down. It was chilly enough to light a fire the other day, so I moved the drying rack into the sitting room and hoped for some help there.

The next day everything seemed a little less tacky, so I crossed my fingers and went ahead with a transparent blue-gray to gray blend. I probably should have given the prints another day in front of the wood stove, but adhesion went okay and it was satisfying to finally get some more interest going in the rest of the image.

Blue-gray-to-gray blend, Step 8

Everything really needs drying time now, so I will carve for the next color and let these sit a bit.

But never fear! I have a commission project started, so won't be twiddling my thumbs. I should be able to share more details about this illustration project soon, but for now I'll just tease you with the idea of up to a dozen birds, printed and then hand-painted and assembled into a larger image. Fun, eh?

Stay tuned.

Saturday, October 26, 2019

Linocut in Progress: After the storm, the lino!

Well.. it's been an exciting week and a half! In the wee hours of Thursday, October 17, a nor'easter crashed along coastal Maine. It knocked down the power pole coming down my road from the main line and took the 21st century with it. We lost power, water (no electricity to pump the well), telephone, internet, and I lost forward momentum.

Luckily the town of Damariscotta got power back fairly quickly, so some computer work could be done at the local coffee shop and showers could be had at the YMCA.. but everything else pretty much ground to a halt. I did go on a nice hike, and I spent one very long and exciting day surveying storm-petrel burrows on an island Downeast, so I certainly found ways to enjoy myself.

We were four days without power and water, and another two without phone or internet. But we've finally shed our pioneer ways and everyone on the peninsula is settling back into a more "normal" groove.

With all that time to sit in the dark and think, I came up with a solution to the problem of the current linocut in progress! As a reminder, here's where the print stood at the last step:

Step 5 recap

The issue for me was the shapes of the large clouds in the upper portion of the image. They were too clunky overall, and the three little white "fingers" that trailed out to the left bugged me a LOT. I had hoped those shapes would be less prominent with the hatch marks around them, but they remained stubbornly awkward-looking.

Of course every area in this image that appears white had been removed from the block at the very first step... before a single color was printed. And by the time I made the first color pass on the trees ALL of the sky material had been removed. It was Just. No. Good.

After some hemming, hawing, and general head-scratching, I decide that the best thing to do would be to cut a second block. But not a complete second block... just a partial one!

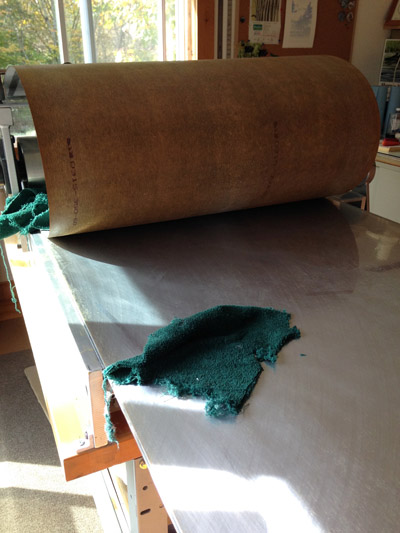
The "fix-it block" in place on the press

Here it is in the registration jig. Unfortunately everything is upside-down to the viewer, so harder to understand what's happening, but at the time I took the photo the light was horrible from the other direction. (So, yes. I'm now asking you to think inside out, backwards, and upside-down. Terrible!)

After the "patch" block

Here's a another look at the small block just after the whole shebang has gone through the press. You can see that the top and sides align with the top of the registration jig, but the bottom edge was cut to follow the shape of the lower cloud.

I put a lot of "activity" in the mark-making on this new partial block. I hadn't done this originally because I thought it might distract from the trees... but that didn't turn out to be the case. In fact I think it's better this way... improving the suggestion of wind-tipped trees along the coast.

Here's the result:

"Corrected" linocut in progress, Step 6

Whew! Now I can turn my attention back to the trees and get this image wrapped up in the next few days. Time to start thinking about what's next, too.

But here's an interesting aside: This image is already historical. The middle of these three trees also came down in last week's storm... leaving a gap and a memory. And a linocut.

Friday, October 11, 2019

Linocut in Progress: A fix and a re-think

Three cheers for my fabulous neighbor, who saw my grumpy face when he stopped by to bring my mail and promptly dropped everything to help me try to fix my press bed. Again.

Since the bubble was right in the middle of the bed and the rest of the adhesive we applied last year seemed to be holding (for now), it would have been a complete pain in the neck to try to pull up the laminate without breaking it.

We opted instead to pull the entire bed out from between the rollers and flip it over. We had only fixed the "top" side last year, and I knew that the original 20-year-old adhesive had also failed on the bottom.  Flipping the bed and dealing with the easier-to-peel-up side saved us a lot of time, elbow grease, and anxiety.

Laminate lifted up to clean the bed and prepare it for new adhesive.

It took the entire afternoon, and the wretched contact cement surely killed a few of our brain cells, but we got 'er done. The next morning I got back to work... which involved a little blue-to-gray blend on the lower third of the block, to get the horizon between sky and water sorted out.

Linocut in Progress, Step 4.5

Finally it was time to get away from the blues. I mixed a sort of olive-y, ochre-y, semi-transparent color and... voila!

Reduction linocut in progress: Step 5.

Except, hmmmm. There's a problem. The sky bugs me. To be honest, it has bugged me from the beginning, but now that there is a color printed that contrasts with the blues, it REALLY bugs me. I'm not satisfied with the shapes of the clouds. I tried to make them billowy, but they just look clunky. Argh. What to do?

Yesterday I considered bagging the entire thing and starting over... something I haven't done in ages. But it has also occurred to me that I might be able to do something interesting with a second block overlapping some transparent shapes in the sky. It's worth a try, anyway! I'll let the prints dry for a day or two and then sacrifice a couple in the name of experimentation.

In the meantime there are plenty of other things to do. In fact the list is overwhelmingly long... so maybe I'll just go take a nap instead!

Tuesday, October 8, 2019

Linocut in Progress: Well, SOME progress... and a set-back

With just one more workshop on the horizon before year's end, I have really been looking forward to some concentrated time in the studio.

So it was with much excitement that I set out to put the next color pass on the linocut that's been languishing for a couple of weeks. I mixed up another transparent blue, checked the press pressure, stacked the dry prints and got started.

And had problems. My matboard registration jig didn't seem to want to lay flat on the press bed, and I was having some minor registration issues. I kept fussing with it all, and then, with a sinking feeling, realized what the problem might be. I pulled the stack of padding paper and jig off the press, and sure enough, there in the middle of the bed, was a bubble.

You might recall that about a year and a half ago, when I finally found a place to live in Maine and got my studio set up, I discovered my press bed had become delaminated while in storage. After much anxiety, and a few false starts, my neighbor and I were able to pull up the laminate and re-adhere it to the bed and I was back to work.

Things have been moving along well since then, but the busy summer workshop and exhibition schedule kept me away from the press most of the summer. I did have a couple little black-and-white projects, but they didn't require precise registration and if there were problems with the bed at that time I didn't notice them.

I notice them now. It's hard to miss a big bubble smack in the middle of the bed.

Luckily the piece I'm working on right now is small enough that I can continue to use a portion of the bed that isn't warped, so I should be able to finish it. The pressure settings might need a little tweaking, but I did finish pulling this color today. I've got a message in to the manufacturer again, and I'll be making a call to my neighbor this afternoon.

In the meantime....at least we're this far:

Linocut in progress, Step 4

Thursday, October 3, 2019

Upcoming Reduction Linocut Workshop at the Farnsworth Art Museum

"Treasured Path," reduction linocut © Sherrie York

We woke to some soft frost this morning on the midcoast, so there's no denying the autumn anymore! 

I've got one more workshop on the schedule before the snow flies and the deep dark season arrives. Actually, it's the weekend WHEN the deep, dark season arrives, since the time will change overnight November 2.

So, quick! Join me for a two-day reduction linocut class at the Farnsworth Art Museum in Rockland, Maine. 9:30-4:30, November 2 and 3. Once you've had experience with a couple of new skills, your winter will fly on by in a whirl of printmaking! Well, it could


Linocut in Progress: The Third Act

Time to wrap up this linocut ! And we are wrapping at warp speed (see what I did there?)... because there are deadlines. Exhibition deadline...