Showing posts with label underfoot. Show all posts

Wednesday, June 19, 2024

Linocut in Progress: Back to Work

Well! Once again, it's been a while since Brush and Baren has seen some love, and I appreciate everyone who stops by to check in with the posts even when they are so erratic. 

Excuses this time? I was away! Far away in another hemisphere! Six weeks of my spring this year was spent having a second autumn... in New Zealand. It was my first visit there– a chance to spend time with a friend I hadn't hugged in 30 years and to run around seeing as much flora and fauna as possible. There's a lot to say about the trip... but for now I'm going to say, "It was amazing," and leave it at that. 

My post-travel re-entry was a bit bumpy, but I'm finding my rhythm again, and happy to be back in the studio.

I'm working in a smaller format than I have for quite some time; this print is just 8x10 inches. The first step was equally modest... just a plain gray rectangle with no material removed from the block.

Reduction linocut in progress: Step 1 printed

Although the block is smaller than usual it appears I have not abandoned my tendency to make everything rather complicated. But let's not panic yet. I carved... well, perhaps it's more accurate to say I chipped, some small areas of the block where I wanted the gray to remain. I rolled up a nice, creamy pale ochre for the second color pass.

Step 2 - rollup

Not much to see here... although if you squint you might see the cooler gray bits showing within the warmer tone.

Step 2 - printed

Subtle base established, it was time to get the brightest colors in place. I don't want this bright yellow to interfere with all of the image, so I cut some newsprint masks to contain it in a wobbly shape through the center of the block.

Step 3 rollup and mask

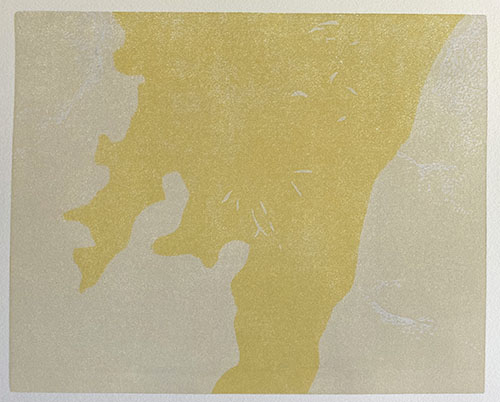
This photo of the print after Step 3 is a bit dark, but you get the idea.

Step 3 printed

I'm guessing the subject matter has been illusive up to this point, but a little sleuthing in the photo below might give you a hint of where we are headed. Or not. 

In the photo these two yellows look quite similar, but I promise they are different. The Step 4 color was started using the leftover ink scraps from Step 3, but I warmed and deepened it with the addition of some red (you can see the little blob of it in the photo). 

Step 4 rollup and mask

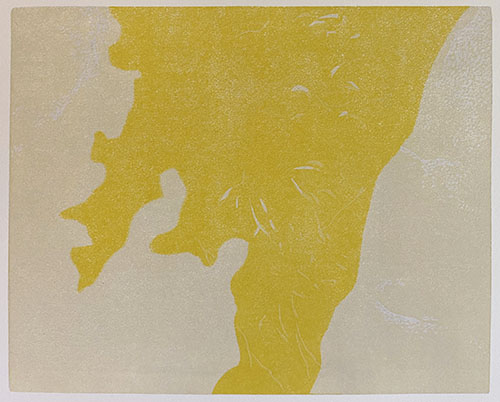
I used the same mask shapes to contain this yellow, too. (Again with the questionable photography! I've been printing and photographing at night... that's my excuse.)

Step 4 printed

Not much to show for four color passes, but things are going to get a bit more dramatic very soon! Stay tuned.

Friday, August 26, 2022

Linocut in Progress: The Saga of Just One More

So this supposedly simple thing has, as is typical for a certain printmaker you know, gotten somewhat less simple. A single-color linocut idea has turned into a multi-color reduction lino epic, and we're not finished yet.

Step 4 rollup. Tasty, if I do say so myself

But seriously. When one gets a chance to mix and use these yummy colors, how can one refuse?

All the purdy step 4 colors

In terms of individual passes through the press this image is at Step 4, but color-wise we are on colors 7, 8, and 9.  My attempt to try something radically different from my usual process has run right off the rails, EXCEPT for one thing. In my usual process it's likely I would be on a press pass of 7 or 8, because I would have made a point in the early stages to mask areas and ink more selectively. For this image I have done zero masking, and have let colors overlap where they will. This has led to some parts of the image having... what shall I call it? Not really color bleed. More like color creep

I am, indeed, allowing color outside the lines. 

Which is all to say that while this isn't drastically different from my usual process, it does represent at least a little relaxing of my (ahem) control issues! 

Here's where things stood after the application of some greens, reds, and more gray.

Linocut in progress: Step 4 printed

I suppose it might have worked to stop at this point, carve for a final black pass, and call it done... but I was teetering dangerously on the fence. Have I gone too far in the addition of color to be able to jump to a single final pass and have it be successful? Am I at the point at which I need to abandon all pretense of trying to keep things "simple?"

Step 5 rollup

I decided I needed a mid-dark value so the jump to a final dark wouldn't be too harsh. Plus... I had unfortunately been ignoring the crab, too. It had gotten a bit too dark and needed lightening.  But surely after "just one more" color pass I'd have a good feel for where I was. Right?

I rolled up a nice olive green for the entire block, and ran a semi-transparent white over the crab.

Step 5 printed

At this point I felt we were at the good news/bad news stage. The good news was that I was starting to feel quite optimistic about the image overall. The bad news was that the "keep it simple" line definitely had been crossed. Plus there's the problem of the crab that needs resolution. Yep. It's anybody's guess how this finishes now!

Thursday, October 3, 2019

Upcoming Reduction Linocut Workshop at the Farnsworth Art Museum

"Treasured Path," reduction linocut © Sherrie York

We woke to some soft frost this morning on the midcoast, so there's no denying the autumn anymore! 

I've got one more workshop on the schedule before the snow flies and the deep dark season arrives. Actually, it's the weekend WHEN the deep, dark season arrives, since the time will change overnight November 2.

So, quick! Join me for a two-day reduction linocut class at the Farnsworth Art Museum in Rockland, Maine. 9:30-4:30, November 2 and 3. Once you've had experience with a couple of new skills, your winter will fly on by in a whirl of printmaking! Well, it could


Wednesday, December 13, 2017

What's It All About Wednesday: Midwinter Debris, Underfoot Series

"Midwinter Debris," reduction linocut © Sherrie York

Our first real snow of the season came to my new stomping grounds in midcoast Maine this week. It was a dozy! Here at my temporary digs on the Pemaquid Peninsula we had about 8" of heavy white stuff. I know it was heavy because I had to shovel it off the deck four times. Once when the snow stopped falling, but three times more after the sun came out and huge melting sheets sloughed off the roof and right on to the porch. (Note to self: When you finally find your own place, be sure it doesn't have a steep roof right above the front door.)

If you've been following Brush and Baren for any length of time you're aware that I like to wander around outdoors... and that I divide my time between staring down at my feet and gazing up at birds when doing so.

The "looking down" behavior prompted an ongoing series, Underfoot, to which I add another image or two each year. This piece, Midwinter Debris, was one of the earliest linocuts in the series. It was hand-rubbed on Hosho paper, during a time when I was still using mostly opaque inks. (Unlike my current practice of using transparent color almost exclusively.) This view included the needles and cones of the ponderosa pine, a signature tree of my former home in Colorado. When I look at this piece I am reminded of montane slopes, bighorn sheep, Steller's jays.

Here in Maine there are no ponderosa pines. No bighorn sheep or Steller's jays. Instead I'm learning to identify white pine and red spruce, their seed structures very different from my western trees. I also have deciduous trees! In this area the woods are dominated by oaks whose first names I've yet to ascertain. Yes, the landscape underfoot is quite different. Plenty of new material for when I can get back to work... which I hope will be soon!


Saturday, August 5, 2017

Linocut in Progress: Picking up where I left off

My two months in New England zoomed by at the speed of light, but this week I returned home to my studio and zoomed right back to work on the linocut that was in progress before I left.

Just as a reminder, here's where the print was at the end of May:

When we last left our hero: Step 6

Settling back down to carve for the next color pass was relatively straightforward, but I did have a little trepidation when it came time to print again. After hanging on the rack for two months the prints were VERY dry, which could have caused some issues. Paper shrinkage, and therefore registration problems, and poor adhesion of new ink layers were two possibilities that sprang immediately to mind.

At the end of my last print session (in May) I folded leftover ink into wax paper and tucked it away. I was pleasantly surprised to find both little packets still viable, so the colors from Step 6 became the base for the next pass.

Wheeeeeeee! Rainbow roll!

This green-to-blue-to-green blended roll looks quite dramatic on the block, but both colors were very transparent. Thankfully I had absolutely no issues with ink or registration, and subtle complexities of foliage started to develop.


Reduction linocut in progress, Step 7

It's all looking rather alarmingly green now, so it's time to sit back and assess what needs to happen next. My inclination is to try to moderate some of the brightness, so maybe I'll try something crazy like a transparent red layer over the entire block! Or not.

It feels good to be back to work... and I'm even happy to have a little ink under my fingernails. Onward!

Monday, May 29, 2017

Linocut in Progress: Believe it or not

When we last left our printmaker, she was distracted from printmaking by an illustration project. It happens.

But I'm happy to report the illustration project is finished and there's been a little progress on the new linocut in the Underfoot series.

The previous post was all about masking, a time-consuming technique I employ from time to time. This post demonstrates how using the masking technique usually convinces me to keep my next few steps simple and straightforward.

Reduction linocut in progress, Step 5. 

It's a little hard to believe that this is already Step 5, but it is! The color passes so far have been 1) very pale transparent beige, 2) light transparent yellow, 3) slightly darker transparent yellow, 4) red printed via masking method, and 5) this yummy yellow-green. (Also very transparent.)

The next step involved a good deal of carving and then the application of a blended ink roll, blue to green, top to bottom. The top ink of the blend was a mixture of straight cobalt and phthalo blues in a good-sized blob of transparent base, so the printed color still reads as green... just a cooler temperature.

Reduction linocut in progress, Step 6.

So far, so good. Unfortunately things are about to get really protracted in the development of this image because I am on the verge of my annual migration to the east coast. I might get one more color pass on here before I go, but even if I do I'm afraid we'll be waiting until August for the conclusion.

But no worries, I shall endeavor to keep us all occupied with other print-related amusements and intrigue. Take, for example, this wonderful video about The British Museum's efforts to conserve Albrecht Dürer's "Triumphal Arch," one of the largest relief prints ever created. (About 3 x 4 meters.) And you thought printmakers were obsessive... take a look at what the print conservator's job entails:


The British Museum also has an exhibition of Hokusai prints on now through August. (Why oh why am I not headed to London? Maine is at least halfway there from here, isn't it?) The clever staff have created another intriguing video to promote the exhibit, check out this beautiful animation of some of Hokusai's work.


Will my next blog post be uploaded from Colorado or Maine? Stay tuned to find out.

Friday, May 19, 2017

Linocut in Progress: Masking unmasked

Ah, May. The month of preparing for east coast adventures and the time of year when the to-do list gets longer instead of shorter each day closer to departure.

Today I choose to be amused by the dance I'm trying to master, the one that swoops semi-gracefully from illustration project to framing to gallery delivery trips to workshop prep to packing (or at least piling up stuff in the corner)... and once in a while to the studio.

There's a fair bit of improvising involved in this particular cha cha. Yesterday I was to make the journey to deliver work to Ann Korologos Gallery in Basalt, but was thwarted by snow over much of the state– particularly on the high mountain passes I am obliged to cross to get from this side of the Continental Divide to that side.

So instead I made a cuppa and shuffled to the studio in my slippers and got to work.

The morning's task was straightforward: A nice, somewhat darker yellow over the entire block:

Step 3 printed (embiggenable with a click)

Of course there's no chance that things will ever stay straightforward when I'm lino-ing. From this point my next step should either be a light green most everywhere OR a deep red in many small areas.

I want both the green and the red to be "pristine," clear hues, but printing either one over the other will certainly muddy things up. It's that whole complementary color issue, in which colors opposite each other on the color wheel (i.e. red and green) will gray each other out. I could resort to using very opaque inks, but they would still be influenced by the already-printed yellow and they'd wreak havoc with subsequent color passes. And besides, I want my colors to stay luminous, not flat and chalky.

This is one of those times when cutting a separate block for each each color pass might be more efficient than reduction printing, but reduction's what I do, so....

It's clear that masking is required... and whether I cut one mask to cover the green or many small masks to cover the red I am in for a tedious few hours. But, hey. It's not like I'm going anywhere today.
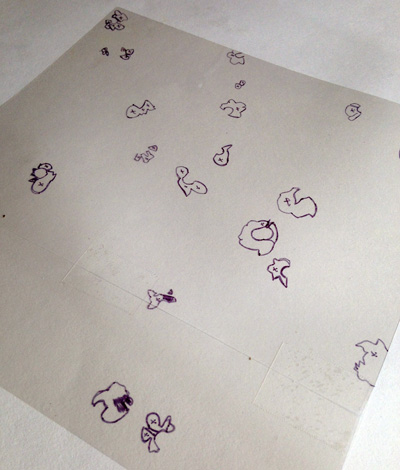
Shapes traced onto mylar sheet

Masking, Step 1: I placed a clear mylar (acetate) sheet over the lino block and traced all the little areas where I want red. See what I mean about tedious? No matter how I approach this mask I will still have to cut out all these little bits. Multiple times. Not my favorite thing, but it's no one's fault but my own. Xacto knife, here I come.

Homemade confetti, anyone?

Masking, Step 2: Once I cut all the little shapes out of the mylar sheet I used it as a template to trace those shapes back on to newsprint. And then... (wait for it).... I cut out the shapes AGAIN. Fortunately I could clip a couple of sheets of newsprint together to cut more than one mask at a time. But let me tell you, I was heartily sick of these things by the time I finished.

Spot-inked block

Masking, Step 3: Inking. Finally. Because I'd be using the mask I could do some rather sloppy spot-inking, and I was very happy to be sloppy at this point.

Mask in place over inked block

Masking, Step 4: I put the block in place on the press and positioned the newsprint mask on top of it. Each print-in-progress is then placed image-side-down over this whole conflagration and printed.

Mask "stuck" to print, but only slightly

Masking, Step 5: Because the previously-printed yellow ink was damp, the newsprint mask stuck to the print each time. It wasn't a problem because the yellow ink was thinly applied and didn't "grab" the mask very much. A little yellow was "stripped" from the prints when I peeled off the masks, but not enough to matter. The best thing I can think of to describe the level of "stuckness" is like static electricity... if that makes sense.

Color pass 4 completed. (Embiggenable with a click)

Here's the print once I peeled away the mask. Masking can be very tedious, but in the long run it's worth the effort. Of course now I have to cut all those little shapes AGAIN, this time from the block itself, but it shouldn't take too long and the next color pass should be a satisfying overall green. At least that's the plan at the moment!

Sunday, May 7, 2017

Print Day in May

Since 2007, Monterey Peninsula College Printmakers (MPC) have devoted the first Saturday in May to fine art printmaking. Ten years later, what began as a local event in the greater Monterey Bay Area of California has become a worldwide celebration of printmaking. 

Yesterday (May 6) was this year's Print Day in May. Artists from 45 US states and 46 countries rolled out some ink and made prints wherever they were: home, studio, school or on the road. 

Since art-making (for me) is a generally solitary endeavor, it's nice to have a virtual printmaking atelier at least once a year. I didn't get much done that was exciting, but here's the quick rundown:

Reduction linocut in progress: Step 1 rollup

It's time to add another piece to the Underfoot series! After all the larger 18" x 18" squares I've been working on recently, this 12" x12" seems totally reasonable.

In addition to printing, I messed around with shooting some video with my phone/camera. This rollup image is a screen shot. Seems like I got the camera in the right place, eh?

The big reveal of Step 1

Aaaaaaaannnnnd... the big first step reveal was completely anti-climactic, since it was just a very pale transparent ochre. Just enough to tone down the white of the paper.

Step 1 printed

Move along. Nothing to see here.

Step 2 was much more fun. I took the remains of that transparent ochre and threw some nice yellow into it. Oooh... daffodil-ish!


Another dramatic reveal.... (Can you tell I worked into the evening? Natural light in the studio is now... not so natural.)

Step 2 reveal

There's still not a lot to show for the work, but I've been focusing on an illustration project lately and it's been several weeks since I've had something other than single-color prints drying in the rack. My world just seems better when the rack is full. 

I still have much work to do on the illustration commission, so it will be a bit of a dance in the studio to try to keep both things going simultaneously. Let's see how well I can keep up!

Step 2 printed

Linocut in Progress: Finishing the Scoters

Let's wrap up this scoter linocut, shall we?  There has been some serious neglect going on for the one female bird in this image. Overal...