Monday, January 23, 2023

Linocut in Progress: Not looking like much!

The current linocut in progress is an odd one, to be sure. It seems like I carve and carve for hours, and then when I print it barely looks any different than the previous color pass. Am I in some sort of weird loop in the space-time continuum? 

Don't believe me? Take a look at this:
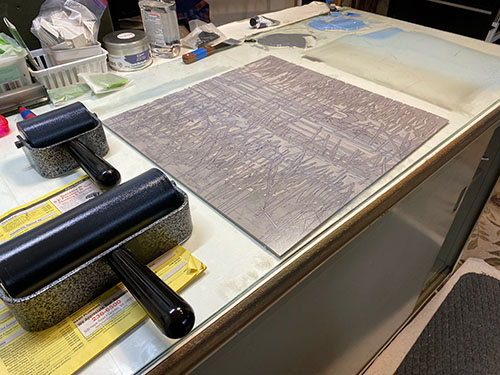
Step 6 rollup

Blues! Nothing but blue ink, over the entire block. Of course these are transparent blues, so the greens will still look green. Like this:

Step 6 printed

See? It all still looks very much like the previous two or three passes. But I was feeling pretty good about everything at this point... although still troubled by what to do about the grasses in across the middle that are still blue. But, hey. Carve now. Worry about color later.

Step 7 rollup

But of course I did have to worry about color eventually. I've an idea now that I'd like to keep the background grasses less contrasty than the foreground... so had an idea that I could use a green-to-gray blended roll to keep the background grasses green, darker the blues of the center section... and then keep the tips of the foreground grasses light while darkening the bases of them. And there's NO blue ink in this color pass.

Step 7 printed


See what I mean? Although if you flip back and forth you will be able to see the subtle differences.

So now it's back to carving again. The things that are bouncing around in my head as I do this?

- It's probably time to start some carving to define the bird(s). 

- Will one more transparent gray finish off the background grasses in a suitable way?

- How MUCH contrast should I aim for in the foreground grasses? And should the next color pass be of warmer temperature?

- How will I resolve the water/grass intersections in the center portion of the image? I think there's only one more little bit of dark blue value to go, so can I get away with shifting to some paler greens first? Or should I go ahead and do the dark blue across the entire center, then carve away the last of the water, and probably have to resort to using some more opaque color in the grasses there? Will this opacity look out of place when everything else is so transparent and luminous? 

So many questions! 

But, as before... the first thing to do is carve away the areas that I know I would like to remain the color they are, so I'll solve the what-to-put-on-top-of-it questions later. (I did mention that avoidance was one of my better skills, right?)

Monday, January 16, 2023

Linocut in Progress: Thinking about the little things....

Okay. Music-facing time is imminent. Actual thinking is required, and there's no way around it anymore. Problems with the current linocut in progress must be solved.

But first! Let's add some more color! Because although resolving the green-across-the-middle issue is still an issue, brightening of the top and bottom of the image seemed like a good way to dodge the problem for one more color pass. 

But slow down, there! One thing we do NOT want to do is put more color layers on the bird(s), where they will only complicate later needs. Time to cut some masks.

Making masks

It's just a bird shape, right? Shouldn't be too complicated. But of course there are some blades of grass that DO want some more color in them, so those areas need to be left printable. What we have here are four individual little pieces that must be cut out (x 24) and placed on the block for each print pass. (Remember Sherrie's mantra: That will make things more complicated and tedious? Let's go there!)

It's difficult to tell from the photo, but to make the masks I put a piece of clear acetate over the block and traced the shapes onto it. I then used this for a pattern to transfer the shapes to newsprint. In the end I think I cut 14 of each of the shapes, because most of the time I was able to use the same mask on two prints in a row. 

Step 5 rollup with masks in place

Here's the inked block on the press with masks in place:

On the press

And here's the Step 5 print:

Linocut in progress: Step 5 printed

Okay. That's pretty good... although I am aware that masking the bird(s) is going to be a thing for a little while longer. At least until I can get the greens-across-the-middle problem solved. 

But oh, those grasses! I think I mentioned before that the photo I'm looking at for inspiration is very fuzzy and washed out, with no distinct shapes. (It was taken from a distance with a lot of zooming in.) Relief printing, by its very nature, is a process of carving distinct shapes. My challenge here is to decide which parts of these grasses to emphasize and which to leave indistinct... and then to figure out how to do "indistinct" with distinct shapes. I dunno. Am I explaining this well? It's muddled in my head, too, so perhaps not. 

ANYWAY. It's easy to get lost in all of this, so as I am carving I am using a trick learned 'way back when from the delightful printmaker Jean Gumpper

A green map!

My tendency is to just jump in and start carving, but as I said, this piece is making me slow down and think. (How rude.) For the next stage of carving I have taken to working out a bit of a map. As I make decisions about what I want to carve away, I first use a colored pencil to define the shapes ON the block. This way I can keep track of where I've been and consider areas carefully. The pencil color was chosen as a bit of a reminder, too, that what I am thinking about is the areas I wish to remain the brighter green. 

So I guess I'm sort of making myself a "carve-by-number" map, eh? Hey. Whatever it takes. 

Onward.

Saturday, January 14, 2023

Linocut in Progress: No, really. I'm still here.

December. It's a thing. And it's a thing that I am glad is behind us. 

Hooray for a new year.!.. one which I hope will bring a bit more cheer than the last few have. It's hard to tell at the moment, since winter has finally arrived in Maine. Well, sort of. We've been on a rollercoaster of too warm with too much RAIN... with brief forays into a wee bit of snow and entirely too much ice. We're in a gloomy patch right now– gray, windy, rainy... with the dreaded freezing rain in the forecast for today. Ugh.

So, hey! I should be in the studio, right? 

And so I have been. Let's catch up, shall we?

The current linocut in progress has turned out to be more challenge than might have been wise this time of year. It's got some tricky color shapes to work out... horizontal marks in one color, vertical in a different color. And the image is inspired by a super-fuzzy, washed out photo full of indistinct shapes that I have to interpret as actual shapes. It's a lot of thinking for someone whose brain is as fuzzy as the photo these days. 

But, onward.

Linocut in progress: Step 3 rollup

Step 3! Let's do some color! Here's where the horizontal-one-color-vertical-another problem is already obvious. I've done a blended roll here, blue to green. While I have a roller wide enough to cover this entire block (18 x 18 inches), I don't really have the space in this studio to roll it out. I'm making do by using a smaller roller to run the blend in one direction and then turning the block to run it in the other direction. Get it?

Step 3 printed

Okay. The water is getting close, but you can see the problem here. There are grasses across the middle that will also want to be green (vertical), but of course I don't want green (or too much green) in the horizontal water shapes. The image is entirely too fussy for me to get excited about cutting masks for all that, but it's a problem I still haven't quite solved for myself. 

One of my best skills is avoiding big decisions, so let's pretend it's not a problem and go back to carving. 

Step 4 rollup

In fact, let's avoid the green problem by going back to gray instead! Yes, good plan. Here's the rollup for step 4, managed the same way with a smaller roller. Actually, TWO smaller rollers, as you see here. The larger one is only 8" wide, so running the blend from each end leaves an un-inked section across the middle. This gets filled in with the smaller 4" roller. Because adding as many steps as possible to each color pass is also one of my best skills. 

(For print equipment geeks out there, these beautiful brayers are made by Takach Press. They will set you back a pretty penny, but they are worth it. A joy to use. )

So, here we are with the printing of Step 4:

Step 4 printed

I am really looking forward to being finished with the water, but we're not quite there yet. I'd like to brighten up the greens a bit... and I can't forget that there are bird(s!) to keep track of, also. I predict masking in the future of THOSE shapes, at least. Stay tuned!

Linocut in Progress: The Third Act

Time to wrap up this linocut ! And we are wrapping at warp speed (see what I did there?)... because there are deadlines. Exhibition deadline...