Showing posts with label masking. Show all posts

Sunday, November 3, 2024

Linocut in Progress: Oh, look. It starts with blue. Again.

 If I had a nickel for every time I started a new linocut with a light blue, I'd have.... a lot of nickels. So let's drop another one in the jar and see what's up this time, shall we?
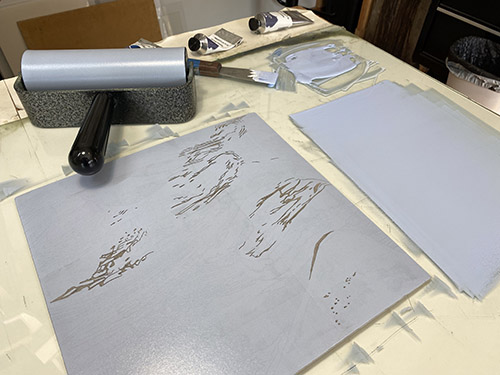
Reduction linocut in progress, Step 1 ink roll-up

That's a weird collection of scribbly carved lines, isn't it? I might be embarking on another one of those "it seemed like a good idea at the time" images, but here we go. 

Step 1 printed

Not much to see here, although readers/followers who know me well will probably have a good guess about the subject matter already.

But let's throw a wrench in that right away. I need to add some bits of warmer color in here, and I want to do it before too much more blue goes down. (There will be a LOT of blue in this image.) I can't possibly hope to contain it in the miniscule areas I have in mind, but I can at least keep this warm color from running completely amok by using a mask.

Creating some masks: trace and trace again

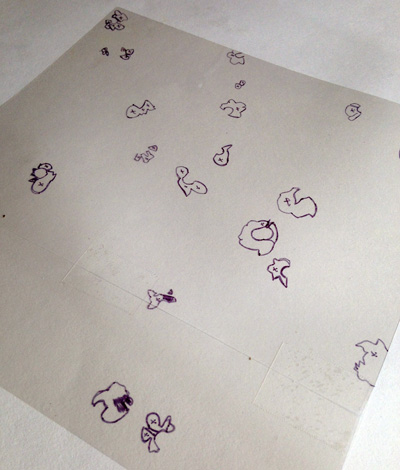
It's been a while since I've explained masking, so let's walk through it now. It's a multi-step process that begins with a sheet of clear acetate. I place the acetate over my lino block and trace the shapes in which I want to contain this warm color. I have been known to cut extremely fussy masks in the past, but I don't have the patience for that at the moment.

After I make the acetate pattern, I trace those shapes onto plain newsprint. 

Cutting the masks

By keeping the shapes fairly simple I am able to cut through several sheets of newsprint at a time without things sliding around too much. This saves time and patience. Which I think I have already mentioned I am a bit lacking in at the moment.

Masks cut, I can turn my attention to rolling up some ink again. Here's a warm light rust color. 

Step 2 rollup

You can see that I didn't roll the color across the entire block. No need, since the color is only going to print through the masked areas, anyway.

Here's the mask in place on the inked block:

Mask in place, ready to print

Important caveat here! You will notice that my newsprint sheet is not as large as the entire print block. This is good from a saving paper point of view, HOWEVER. It only works to use a short sheet when the already-printed ink color(s) are dry. If the previously-printed ink is at all damp, the newsprint will strip some of it off the prints. This can be a good thing in some instances, and a bad thing in others. In this case, if my already-printed blue was still damp I would end up with a harsh line 2/3 of the way down the print, with lighter blue on top and darker on the bottom. Not what I want! But the blue was quite dry already, so no problem.

Step 2 printed

Weird-looking, huh? I am either very clever or I've already made a mess. Only time (and a few more ink layers) will tell.

Monday, January 16, 2023

Linocut in Progress: Thinking about the little things....

Okay. Music-facing time is imminent. Actual thinking is required, and there's no way around it anymore. Problems with the current linocut in progress must be solved.

But first! Let's add some more color! Because although resolving the green-across-the-middle issue is still an issue, brightening of the top and bottom of the image seemed like a good way to dodge the problem for one more color pass. 

But slow down, there! One thing we do NOT want to do is put more color layers on the bird(s), where they will only complicate later needs. Time to cut some masks.

Making masks

It's just a bird shape, right? Shouldn't be too complicated. But of course there are some blades of grass that DO want some more color in them, so those areas need to be left printable. What we have here are four individual little pieces that must be cut out (x 24) and placed on the block for each print pass. (Remember Sherrie's mantra: That will make things more complicated and tedious? Let's go there!)

It's difficult to tell from the photo, but to make the masks I put a piece of clear acetate over the block and traced the shapes onto it. I then used this for a pattern to transfer the shapes to newsprint. In the end I think I cut 14 of each of the shapes, because most of the time I was able to use the same mask on two prints in a row. 

Step 5 rollup with masks in place

Here's the inked block on the press with masks in place:

On the press

And here's the Step 5 print:

Linocut in progress: Step 5 printed

Okay. That's pretty good... although I am aware that masking the bird(s) is going to be a thing for a little while longer. At least until I can get the greens-across-the-middle problem solved. 

But oh, those grasses! I think I mentioned before that the photo I'm looking at for inspiration is very fuzzy and washed out, with no distinct shapes. (It was taken from a distance with a lot of zooming in.) Relief printing, by its very nature, is a process of carving distinct shapes. My challenge here is to decide which parts of these grasses to emphasize and which to leave indistinct... and then to figure out how to do "indistinct" with distinct shapes. I dunno. Am I explaining this well? It's muddled in my head, too, so perhaps not. 

ANYWAY. It's easy to get lost in all of this, so as I am carving I am using a trick learned 'way back when from the delightful printmaker Jean Gumpper

A green map!

My tendency is to just jump in and start carving, but as I said, this piece is making me slow down and think. (How rude.) For the next stage of carving I have taken to working out a bit of a map. As I make decisions about what I want to carve away, I first use a colored pencil to define the shapes ON the block. This way I can keep track of where I've been and consider areas carefully. The pencil color was chosen as a bit of a reminder, too, that what I am thinking about is the areas I wish to remain the brighter green. 

So I guess I'm sort of making myself a "carve-by-number" map, eh? Hey. Whatever it takes. 

Onward.

Wednesday, October 3, 2018

Linocut in Progress: The blues. And a pink.

Hooray! A little bit more progress has been made on the current linocut in progress. Finally I'm seeing a little bit of acceleration of drying times. Not much. But a little.

This crazy duck has a pink-and-black bill, and of course I don't need the pink anywhere else, so as soon as the prints were dry enough to work around the bird's face I decided it needed a little pochoir. I've talked about this technique before... basically it's an old hand-coloring technique that I occasionally employ when I need a little bit of a color in one small area.

So, voila! The bird has his pink bill.

Reduction linocut in progress, Step 10.

I am really starting to despair about the value of the colors on the shadowed side of the bird. I think I'm going to have to resort to some drastic measures before this thing is finished. But making that judgment is just going to have to wait a bit longer.

I'm challenged by this water, too. Despite using light-to-dark blended rolls I feel like the water is just a bit flat. In the photo everything looks a bit gray, but in real life I felt it was too bright, so I mixed up some gray-blues and did a top-to-bottom, light-to-dark blended roll over the entire block.

Well. Almost the entire block. Since I'm concerned about the face, I went ahead and masked that out so I wouldn't complicate things any further.

Do we dare call that a facemask?

If the prints are dry enough when using a mask, the mask will stay stuck to the block when the print is peeled back. If they are too tacky, sometimes the mask will stick to the print... and getting it off can be a nail-biting experience. Luckily, these were, as Goldilocks once said, juuuuust right.

Here. I can prove it to you.


And here's where we are now:

Reduction linocut in progress, Step 11

The green is finally just right, too, so the next step will be to leave a little bit of that luscious color and then darken the rest of the wave. Somehow. I haven't quite figured that out yet.

I have a little bit of time to think about it, because tomorrow morning I'm off to Florida (what?) for the Society of Animal Artists' annual exhibition and members' meeting. The 58th Art & the Animal exhibition is currently on view at the brand new James Museum of Western and Wildlife Art in St. Petersburg and continues through October 28. There's an artist "meet and greet" reception on Friday evening, so if you're in the area, I'd love to say hello. The Friday night event requires a ticket, so check out the museum's website for more information.

I'll be back in the studio next Tuesday, hopefully with dry prints and a fresh idea about how to wrap this thing up. Oh, and if you haven't been following me on Instagram, you might have missed this little up-and-coming project.


What's it going to be? Heck if I know. But it's going to be... something.

Friday, May 19, 2017

Linocut in Progress: Masking unmasked

Ah, May. The month of preparing for east coast adventures and the time of year when the to-do list gets longer instead of shorter each day closer to departure.

Today I choose to be amused by the dance I'm trying to master, the one that swoops semi-gracefully from illustration project to framing to gallery delivery trips to workshop prep to packing (or at least piling up stuff in the corner)... and once in a while to the studio.

There's a fair bit of improvising involved in this particular cha cha. Yesterday I was to make the journey to deliver work to Ann Korologos Gallery in Basalt, but was thwarted by snow over much of the state– particularly on the high mountain passes I am obliged to cross to get from this side of the Continental Divide to that side.

So instead I made a cuppa and shuffled to the studio in my slippers and got to work.

The morning's task was straightforward: A nice, somewhat darker yellow over the entire block:

Step 3 printed (embiggenable with a click)

Of course there's no chance that things will ever stay straightforward when I'm lino-ing. From this point my next step should either be a light green most everywhere OR a deep red in many small areas.

I want both the green and the red to be "pristine," clear hues, but printing either one over the other will certainly muddy things up. It's that whole complementary color issue, in which colors opposite each other on the color wheel (i.e. red and green) will gray each other out. I could resort to using very opaque inks, but they would still be influenced by the already-printed yellow and they'd wreak havoc with subsequent color passes. And besides, I want my colors to stay luminous, not flat and chalky.

This is one of those times when cutting a separate block for each each color pass might be more efficient than reduction printing, but reduction's what I do, so....

It's clear that masking is required... and whether I cut one mask to cover the green or many small masks to cover the red I am in for a tedious few hours. But, hey. It's not like I'm going anywhere today.

Shapes traced onto mylar sheet

Masking, Step 1: I placed a clear mylar (acetate) sheet over the lino block and traced all the little areas where I want red. See what I mean about tedious? No matter how I approach this mask I will still have to cut out all these little bits. Multiple times. Not my favorite thing, but it's no one's fault but my own. Xacto knife, here I come.

Homemade confetti, anyone?

Masking, Step 2: Once I cut all the little shapes out of the mylar sheet I used it as a template to trace those shapes back on to newsprint. And then... (wait for it).... I cut out the shapes AGAIN. Fortunately I could clip a couple of sheets of newsprint together to cut more than one mask at a time. But let me tell you, I was heartily sick of these things by the time I finished.

Spot-inked block

Masking, Step 3: Inking. Finally. Because I'd be using the mask I could do some rather sloppy spot-inking, and I was very happy to be sloppy at this point.

Mask in place over inked block

Masking, Step 4: I put the block in place on the press and positioned the newsprint mask on top of it. Each print-in-progress is then placed image-side-down over this whole conflagration and printed.

Mask "stuck" to print, but only slightly

Masking, Step 5: Because the previously-printed yellow ink was damp, the newsprint mask stuck to the print each time. It wasn't a problem because the yellow ink was thinly applied and didn't "grab" the mask very much. A little yellow was "stripped" from the prints when I peeled off the masks, but not enough to matter. The best thing I can think of to describe the level of "stuckness" is like static electricity... if that makes sense.

Color pass 4 completed. (Embiggenable with a click)

Here's the print once I peeled away the mask. Masking can be very tedious, but in the long run it's worth the effort. Of course now I have to cut all those little shapes AGAIN, this time from the block itself, but it shouldn't take too long and the next color pass should be a satisfying overall green. At least that's the plan at the moment!

Linocut in Progress: The final step... twice. No. Three times.

 Okay, let's wrap this thing up, shall we? How much more can there be? There's almost nothing left on this block! The background is ...