Well! Once again, it's been a while since Brush and Baren has seen some love, and I appreciate everyone who stops by to check in with the posts even when they are so erratic.
Excuses this time? I was away! Far away in another hemisphere! Six weeks of my spring this year was spent having a second autumn... in New Zealand. It was my first visit there– a chance to spend time with a friend I hadn't hugged in 30 years and to run around seeing as much flora and fauna as possible. There's a lot to say about the trip... but for now I'm going to say, "It was amazing," and leave it at that.
My post-travel re-entry was a bit bumpy, but I'm finding my rhythm again, and happy to be back in the studio.
I'm working in a smaller format than I have for quite some time; this print is just 8x10 inches. The first step was equally modest... just a plain gray rectangle with no material removed from the block. |
| Reduction linocut in progress: Step 1 printed |
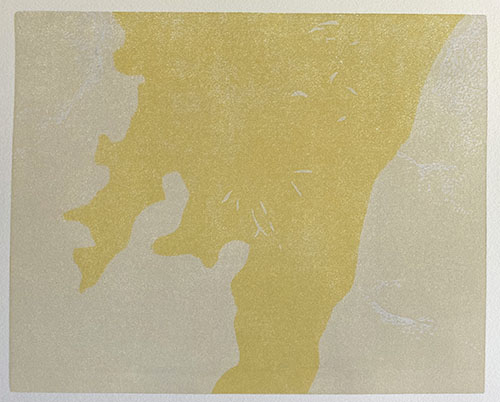
Although the block is smaller than usual it appears I have not abandoned my tendency to make everything rather complicated. But let's not panic yet. I carved... well, perhaps it's more accurate to say I chipped, some small areas of the block where I wanted the gray to remain. I rolled up a nice, creamy pale ochre for the second color pass.
 |
| Step 2 - rollup |
Not much to see here... although if you squint you might see the cooler gray bits showing within the warmer tone.
 |
| Step 2 - printed |
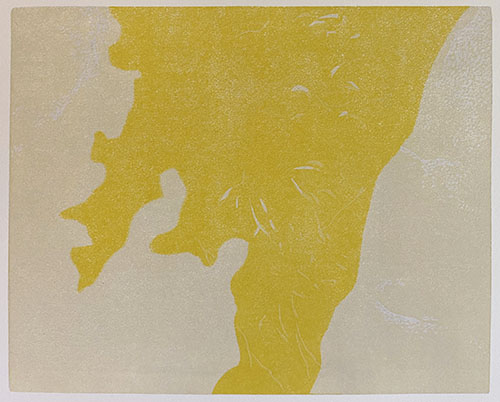
Subtle base established, it was time to get the brightest colors in place. I don't want this bright yellow to interfere with all of the image, so I cut some newsprint masks to contain it in a wobbly shape through the center of the block.
 |
| Step 3 printed |
I'm guessing the subject matter has been illusive up to this point, but a little sleuthing in the photo below might give you a hint of where we are headed. Or not.


No comments:
Post a Comment