 |
| How sad is it to have my studio door open out on to such green? Not sad at all! |
Wow. It's been more than six months since I've been able to start a blog post with those lovely words: linocut in progress. The cross-country shift turned out to be even more epic than I expected, but now that I'm more or less settled in one place for a while I can barely remember the hard parts. Ain't that the way it goes?
So.... without further ado... let's start figuring out the reduction linocut process in a new space and new environment. (With a recently-repaired press, to boot.)
 |
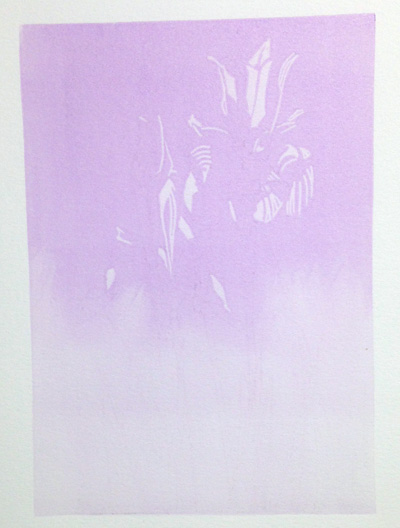
| Linocut in progress, Step 1 |
Among the procedures I need to sort out is a set up for photographing work in progress. I have a combination of overhead lighting and table lamps in the new space, and I still need to make some adjustments to keep the unwanted shadows to a minimum. But no matter... this first step looks like a transparent lavender rectangle because that's what it is.
 |
| A little hand-wiping for Step 2 |
The second color pass is another run of the transparent lavender, a little darker. I don't need or want all this purple-y business everywhere on the block, but I really wasn't ready to start up the fussy mask cutting routine again. My solution was to roll ink in the top half of the block and then use a paper towel to hand-wipe the edge and make it more interesting.
 |
| Step 2, printed |
At this stage I found it so satisfying to have a drying rack full of prints again that I kept wandering in to the studio just to admire them.
But then there was a four-day riot of busy-ness: Friends arrived from Michigan for a visit; high school graduation festivities ensued for a friend's daughter, our ukulele group played a gig at the annual Ukulele Festival up in Belfast, and I met with Hog Island Audubon Camp's first Artist in Residence of the season and got her settled for her session. Whew! Oh... and there was the distraction of a snowy owl that was caught on a seabird island and had to be transported to a rehabber. But that's a whole other story.
So the prints sat for a couple of days, getting more or less dry. Drying times and paper behavior are two of the things I'm concerned about in my new environment. The Upper Arkansas Valley in Colorado, where I moved from, is high desert, with fewer than 10 inches average annual precipitation and practically non-existent humidity most of the time. Where did I move TO? The coast of Maine. This is not desert, and it does have humidity. Lots of it, some days.
To help me sort out the conditions in my new space I got a temperature and humidity gauge for the studio. It's been raining all day today, but the inside humidity level stayed at a constant 47%. I'm having a little bit of issue with paper curling, but some of that might also be coming from incorrect pressure settings. I zeroed out the press after we repaired the bed, but I need to do it again now that it's been settled in its space. I loosened the pressure a bit today and the paper seems to be behaving better.
 |
| Ahhhhhhhh! Masks already! |
Remember how I said, a mere 5 paragraphs ago, that I wasn't ready to mess around with cutting masks yet?
(sigh) I lied.
I didn't want to do it, honest. But it was the best decision for the next two color passes, so I cut masks. A lot of them. I'm starting with 30 prints this time around, since I'm assuming there could be technical issues as I learn new parameters. And naturally I needed this same mask for two different color passes.
Both Step 3 and Step 4 utilized a transparent ultramarine blue.
Here's the mask in place, ready to print.
 |
| Newsprint mask in place, Step 3 |
And here's color pass number three printed. The resulting color looks quite purple, which is not surprising given the lavender ink underneath.
 |
| Step 3 printed |
More masks, more blue ink. Step 4:
 |
| Step 4 printed |
I expect I'll need to leave these to sit now for a day or two, especially since it's going to continue raining. Most of the flower shapes will be carved away at this point, and then work will begin on stems, leaves, and background. Despite the fact this block has been drawn up since before I left Colorado I don't really have a plan for what will happen from this point on... so a day to consider where this is headed is probably a good thing.
Being able to write a work-in-progress post is one more indication of a return to what passes for normal in my world. Thanks for waiting so patiently to join me again on the printmaking rollercoaster!


The transparent ultramarine pass over the lavender was the *perfect* color! And I love the wiping effect on the lower third. I'm looking at how small and fun your iris block is and think I need to stop dithering over my next big multiple block lino project. And just do a small reduction like that to break the ice after etching for months.
ReplyDeleteEspecially since I don't yet know anything about how paper and ink (and my gimpy press) are going to act in this new reality, working small seemed the best way to start. I've got a larger commission piece (!!) waiting in the wings, so hopefully I'll move through this one without too many hiccups!
Deletedo you find the inks mixing differently now?
ReplyDeleteWhat sort of paper do you use for the masks? And do you use a new one each time you print?
ReplyDelete