Showing posts with label iris. Show all posts

Wednesday, June 27, 2018

Linocut in Progress: Wrapping up the iris

So where were we? Oh, of course. We were trying to figure out how I'd managed to put eleven color passes on this little (5x7 inches) linocut without actually resolving the image.

The answer is, of course, poor planning. Or more correctly: no planning. I was so anxious to be printing that I just dived in to a block that had been roughly drawn out probably 9 months ago... and I didn't really give any thought to the end goal.

After the last ochre-to-blue blend, which created some darker leaves in the lower part of the image and warmer tones in bases of the flowers, I finally sat back and assessed. And I wasn't particularly pleased. It just seemed too... something.

I thought perhaps I needed to do (ahem) just one more ochre-to-blue pass and create a few more details. So I did that.

Reduction linocut in progress, Step 12

And I still wasn't happy. These darker bits in the flowers were now too dark and they had become quite clunky.

So I did something I rarely do. I fished out some white ink, added it to a little bit of ochre, and then added some transparent base to it. I applied this color only to a few small areas within the flowers.... et voila....

"Iris," reduction linocut, thirteenth and final color pass. ©Sherrie York

The flowers now have a better relationship to the background and everything feels a bit more harmonious.

There were many ups and downs during the printing of this linocut. This was partly due to the lack of clear planning mentioned above, but of course I was also working in a new space and new environment... and I hadn't done a reduction print in six months. Can you believe it? Neither can I. No wonder I was getting a bit cranky.

But I've definitely dusted out the cobwebs now, and hopefully the next piece will go a little more smoothly. And yes... the next piece is already underway!


Monday, June 25, 2018

Linocut in Progress: Blooming ridiculous!

It turned out that slower drying times weren't much of a problem in the last week, since I found myself out of the studio as much as in. Bird artists gotta go hang out with birds sometimes, and I was lucky enough to be involved in nest surveys on a couple of coastal islands. Any action that involves boats, birds, and islands has the potential to turn into an adventure, so many of my out-of-studio days ran longer than expected.

But that's a whole other story. Back on the mainland things have started to take on a familiar routine. You remember... it's the one in which a certain printmaker keeps saying, "I think I need another intermediate color pass."


But first! I was thankful that I had saved the cut-away portions of the masks used on the last two color passes, because I was getting too much green influence in the centers of the flower petals. I wanted a little bit of non-purple color there in order to give the blooms a relationship with their background, but it was getting too intense.


Here's a closer look at the "inside out" masks. Sort of like using the donut holes instead of the donuts? And at Step 9 (another blended roll) printed.

Reduction linocut in progress, Step 9

One more step (another blended roll) to finish off the subtle texture in the background.

Step 10

Okay. Upper background is finished and all that material removed. I want a few more darks in the leaves... but I dislike the amount of green in the bud cases and centers of the flowers. The next ink roll was a kind of ochre-to-blue green blend.

Step 11

Step 11 ?!?!?! How the heck did that happen? Even more importantly, how am I going to finally wrap this thing up? I am feeling acutely those six months away from the studio... like being wobbly on a bicycle when you haven't ridden for a long time. Or maybe it's more like trying remember vocabulary in a language you haven't used in a while. The knowledge is in there somewhere, but it's jumbled and the access is a bit clumsy.

Let me assure you that resolution of this piece did come.. but let's save that for another day. Until then, here's a picture of two chicks on an island.

Wednesday, June 13, 2018

Linocut in Progress: Tone it down, will ya? Also... does it feel damp in here to you?

Gradually I am becoming more comfortable in my new studio space. The biggest issue at the moment is learning to work in a far more humid environment. I bought a temperature/humidity gauge for the studio and have been keeping an eye on it. So far the room stays fairly stable despite big humidity swings outside. Still, 40-48% indoors is a heckuva a lot different from Colorado, where humidity levels that high would have us all whining about how muggy it was.

That said, the biggest issue so far seems to be drying time. After the previous (rather entertaining) bright-green-over-lavender-makes-yellow pass I immediately jumped in to a color pass I hoped would tone everything down. Naturally I forgot to take photos during this, but here's a swatch of the color I used:

Inky!

It's a very transparent sage-y green... and in case you're wondering, in this photo the ink is sitting on a sheet of wax paper. I had already cleaned everything up and folded the leftover ink into a wax paper packet to keep it usable for later before I remembered, "D'oh! Photos!"

Here's the result. Light green now, and ochre, but less bright. I saved a few little lines of that bright yellow just because I could.

Reduction linocut in progress, Step 7

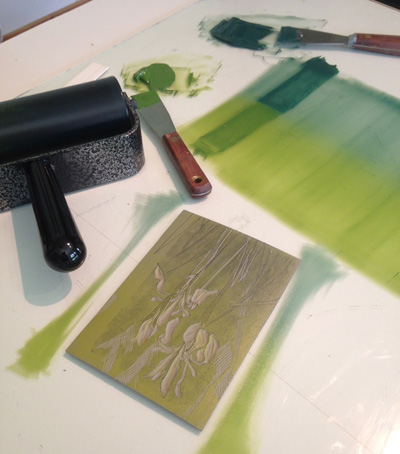
At this point I decided it was time to get more direct about greens, and to get some blended color going. I mixed a couple of lovely greens and again jumped in to print..

And immediately had to stop. Wet rejection! Argh! The prints were entirely too wet. Color wasn't adhering correctly, fine lines were filling in. Nothing to do but clean up and walk away.

When things were still really tacky the next day I did a little bit of  gentle "stripping" by hand. I took a fresh sheet of newsprint, placed it over the top of each print, and rubbed it firmly with the palm of my hand. This pulled up a tiny bit of ink, but not even enough to transfer color to the newsprint*.

(*Stripping freshly-printed ink will remove a lot more color, and stripping through a press instead of by hand will be even more aggressive. I recommend judicious and careful use, especially the first time you try this technique! If your ink is too tacky and you apply too much pressure you can also make the newsprint stick to your prints. This is bad.)

By the next day I was ready to print again, so I pulled out the lovely greens I had mixed previously (and folded into wax paper to keep fresh) and set up for a blended roll.


I'm trying to get some soft color in the upper background... sort of like the out-of-focus blur of photography, but not really. Just less hard edges. I carved some subtle texture in to some areas of the background, and a few less-subtle details in the stems and leaves of the flowers.

Step 8

Alrighty, then! Back on track. A little more fine texture in the upper background and then I think I'll be ready to eliminate it entirely. Three, maybe four passes left? It's a lot for such a small piece, but after six months away I'm not surprised I'm going a bit overboard.

Time to go downstairs and see how wet the prints are this morning!

Saturday, June 9, 2018

Linocut in Progress: When purple + green = yellow

When watercolor was my primary medium I used to complain that I painted like a printmaker. I love the soft, subtle effects that are possible with watermedia, but no matter how hard I tried my paintings still came out graphic and (I thought) kind of flat.

So I started making linocuts... arguably one of the most boldly graphic of the printmaking techniques. And what am I doing with it? Treating it like watercolor, overlaying transparent and blended color.

The surprise, delight, and (sometimes) frustration of working with transparent color is that one's rudimentary understanding of color theory can sometimes be pushed to its limits.

When chartreuse over lilac results in... yellow?

Take this step, for example. I wanted to start work on the background of these iris, which is not going to be lavender. I will, of course, be putting a lot of green around the blooms, so adding a green seems logical.

I didn't add any transparent base to my ink at this stage, because I wanted a light yellow-green color and knew that my yellow inks tend to be fairly transparent as they are. The chartreuse-y color at the top of the photo was mixed from a little permanent green light added to a couple different light yellows... dregs of an old Daniel Smith stash plus some Cranfield. I didn't expect the color to appear green when printed over the existing lavender, but I was a little surprised by how yellow it was!

But after one print I (of course) decided I needed one more darker violet pass in the blooms before I went all crazy with greens, so I cleaned off the block, cut MORE stencils (sigh), and did one more transparent blue pass.

Color is a little too... contrast-y... in the photo, but you get the idea.

Okay, onward. Back to the green. Some of it will print on to the flower blooms, which means we're about to enter an "ugly duckling" stage, but there's nothing to but dive on in.

Linocut in progress, Step 6
Geez, can you believe we're already at color pass #6 and we still haven't gotten away from the flowers? A bit ridiculous, really.

But in one pass of the bright green I now have an ochre, a yellow, and a dull green. Pretty good trick, eh? Now for some head scratching while I figure out where I'm going next.

Sunday, June 3, 2007

Gotcha!


Last year I waited all season for the wild iris to bloom along the river. Every day I walked past the little clumps of buds.... impatient for them to open.

Which they, of course, did while I was away.


Early last week I saw that this season's bloom was underway, but this morning was the first opportunity to eek out an hour to run down there and make a sketch. Some of the clusters have faded already (she who hesitates is lost)... but there are a few at their peak. And a few left to bloom.


I'm home for a bottle of water and a hair scrunchy... forget work, I'm gonna go draw. (Oh, wait. Drawing IS my work!)

Linocut in Progress: Did You See That?

Put on your deerstalkers and get out your magnifying glasses, because we're back to trying to sleuth out the order of operations on this...